
I start with the raw photo. Most cameras let you change the photo compression, pick the smallest of the compression file types as it holds the most detail/data.

You can use plenty of photo editing software; I am using Camera Raw with Adobe; they do not sponsor me.

We have the photo in the middle, and on the right-hand side list all the changes I can make. Just play around with the slider, move it to the left and right to see how it affects the photo.

See how different it looks. You can move the sliders around to find something you like, or you can cheat and use the presets.


I selected Preset options and used the Matte preset, but it’s still not right for me. I want more colors and a darker sky. I increased the Saturation for some more color on the foreground and then went for the graduated filter for the sky.
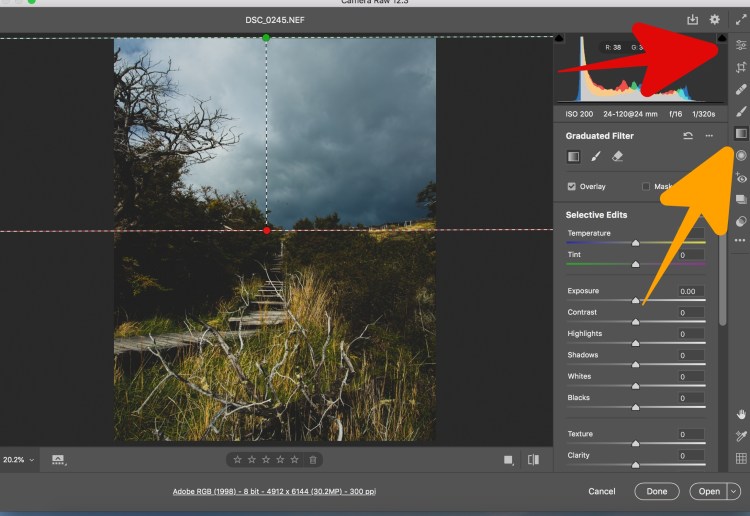
The red arrow points to the edit icon to return to the previous screen, then select the orange arrow icon, Graduated Filter. You use the mouse to click hold and drag the filter down from the top of the photo (green point) to the horizon (redpoint); I now have the whole sky in my filter. Everything you edit in this mode will only affect the area between the green and red dotted lines.

I took the Highlights, Shadows, White, and Black slides to the far left and the Contrast to the right. As you can see, I now have a much darker sky, but the grass and boardwalk have not been affected.
Below is the final effort. Keep in mind that I made the files in this blog post small, like 1MB, to save on loading time. So it has more detail in the 30MB file. I hope this helps.

